Validation Rules
Validation Step
How to define validation rules for your workflows
This feature is not yet supported for the JSON Schema config type.
Adding a new step
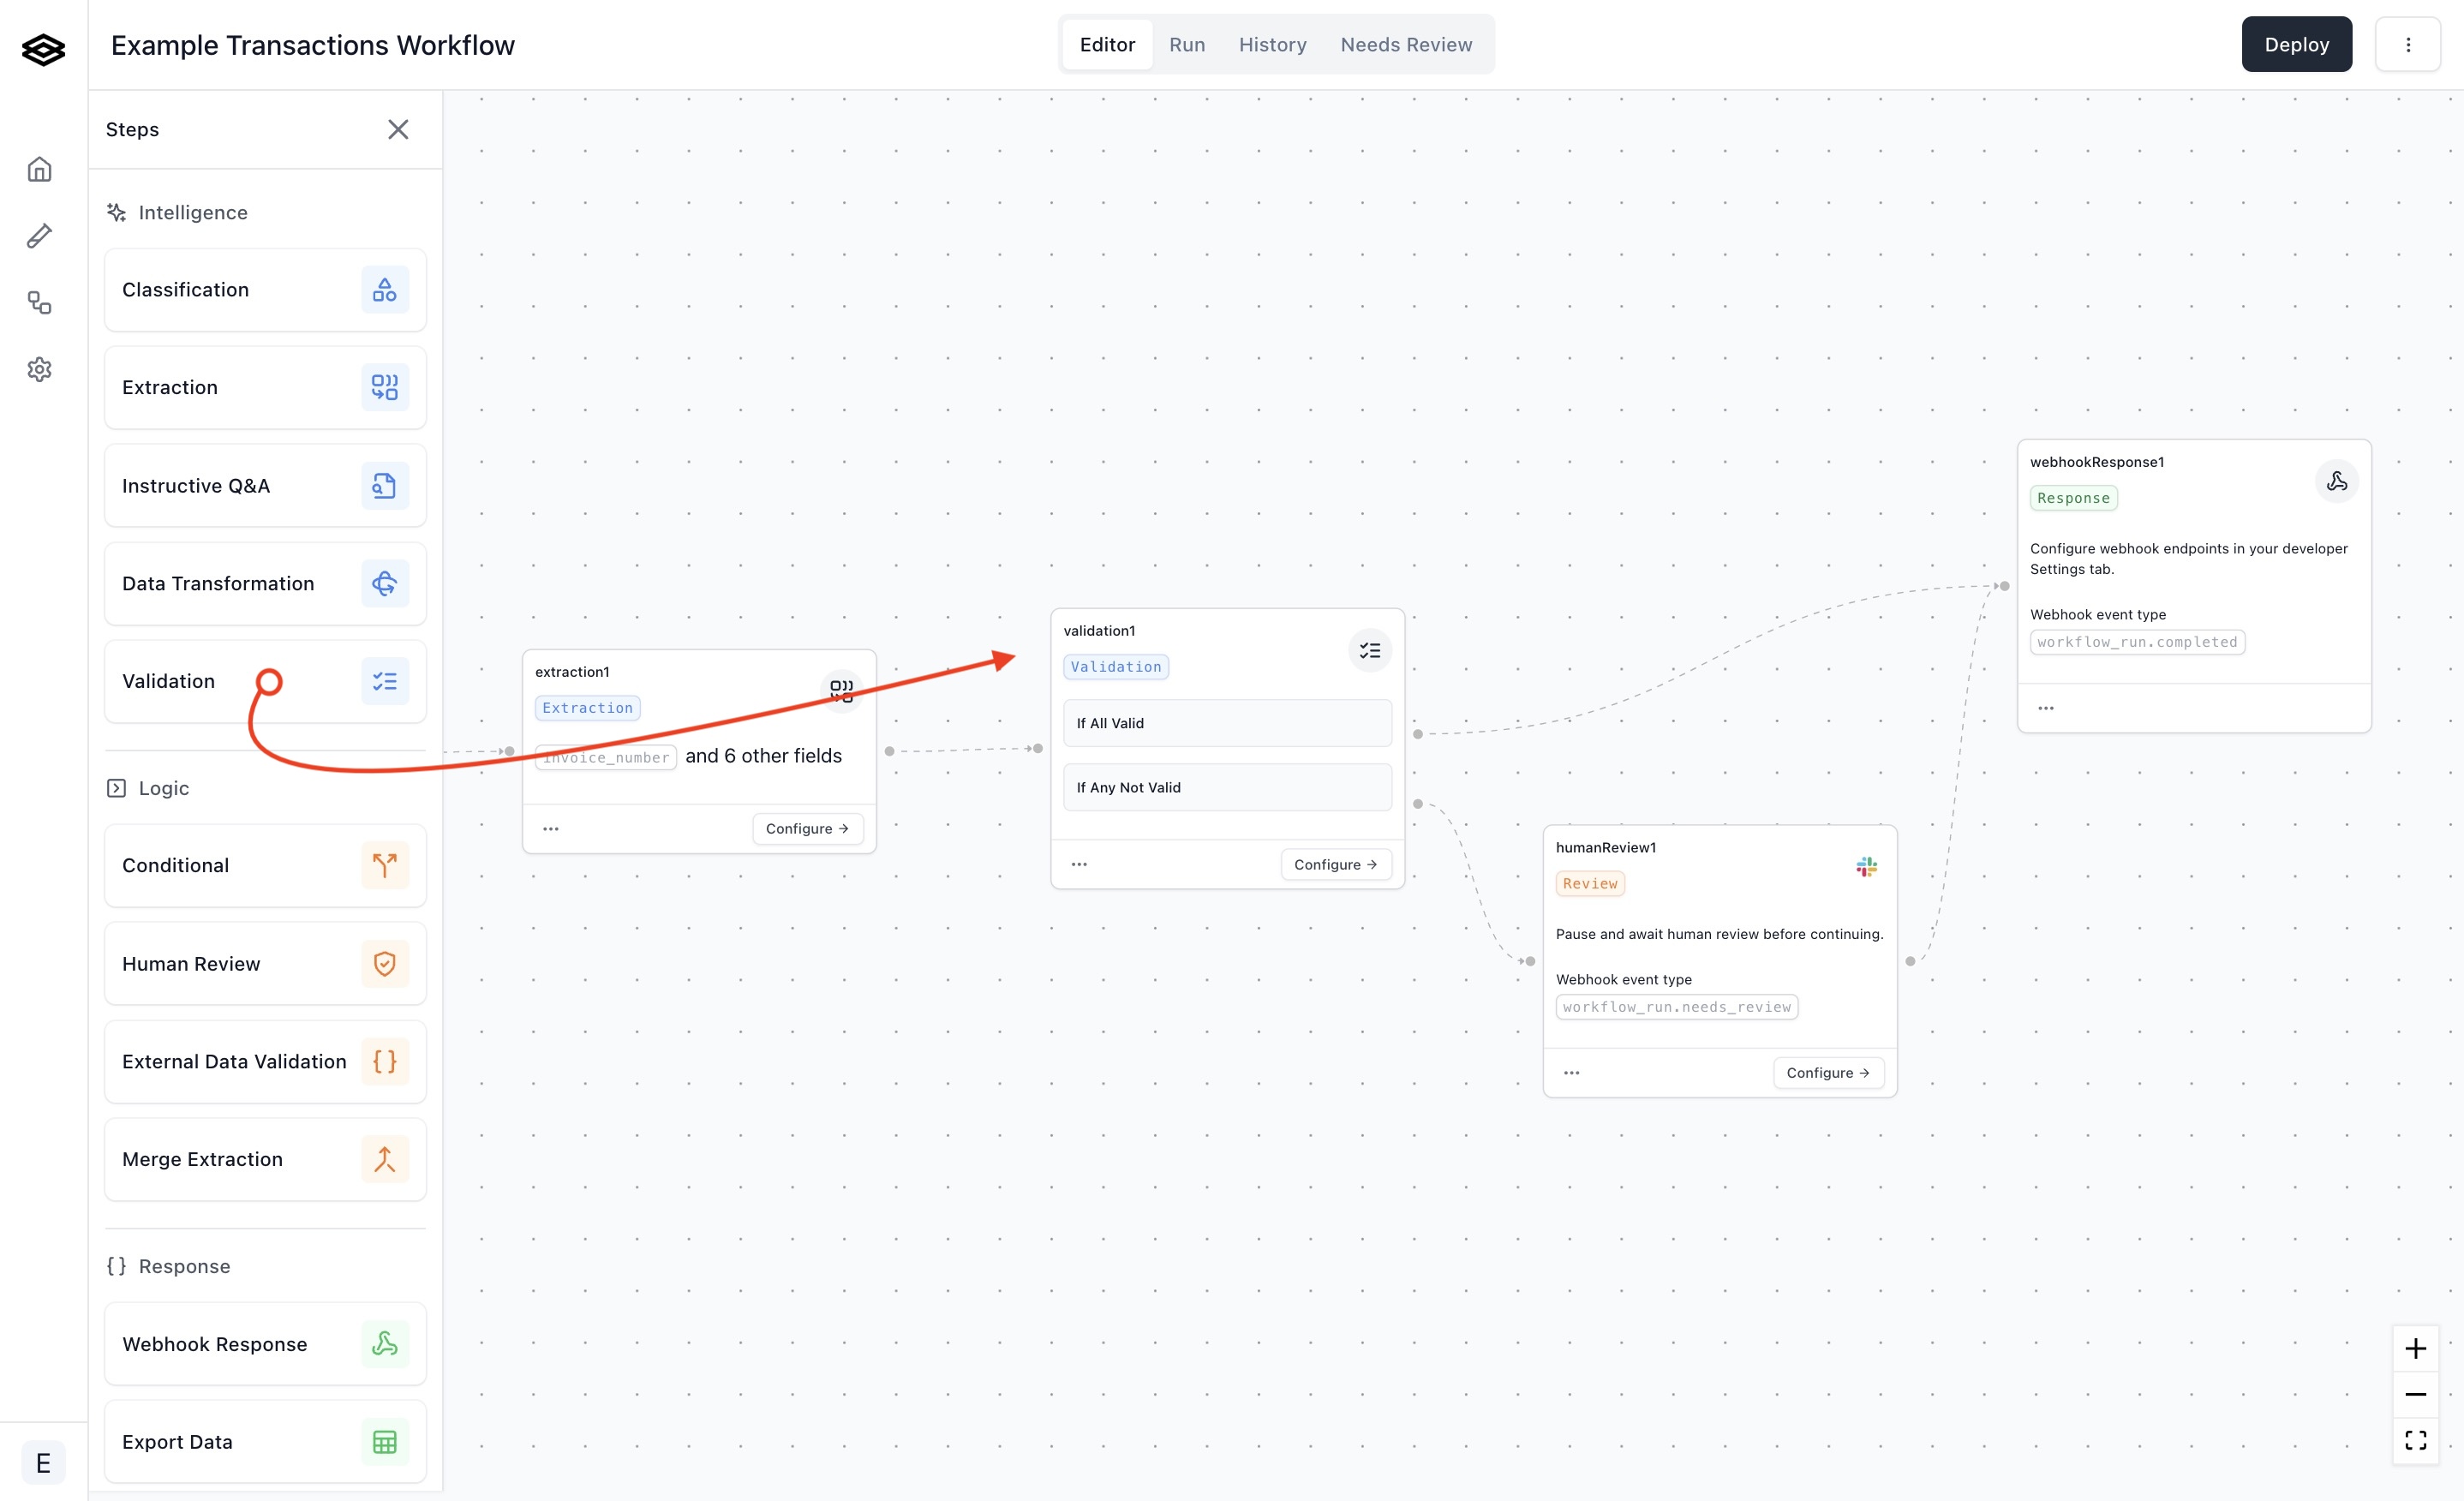
Start by dragging aValidation step into your workflow.
 A Validation step has a single input step which simply determines when to run the validation.
Rules can reference data from all steps that come before it, so you do not need to directly connect a step to the Validation step to validate that step’s outputs.
A Validation step also has two output steps, one if all the rules pass and one otherwise.
Only one of the two output steps will be executed for any single workflow run.
An example workflow topology is to connect the Webhook Response step if all rules pass and a Human Review step if not.
Configuring rules
Click on a Validation step’sConfigure button to configure the step’s rules.
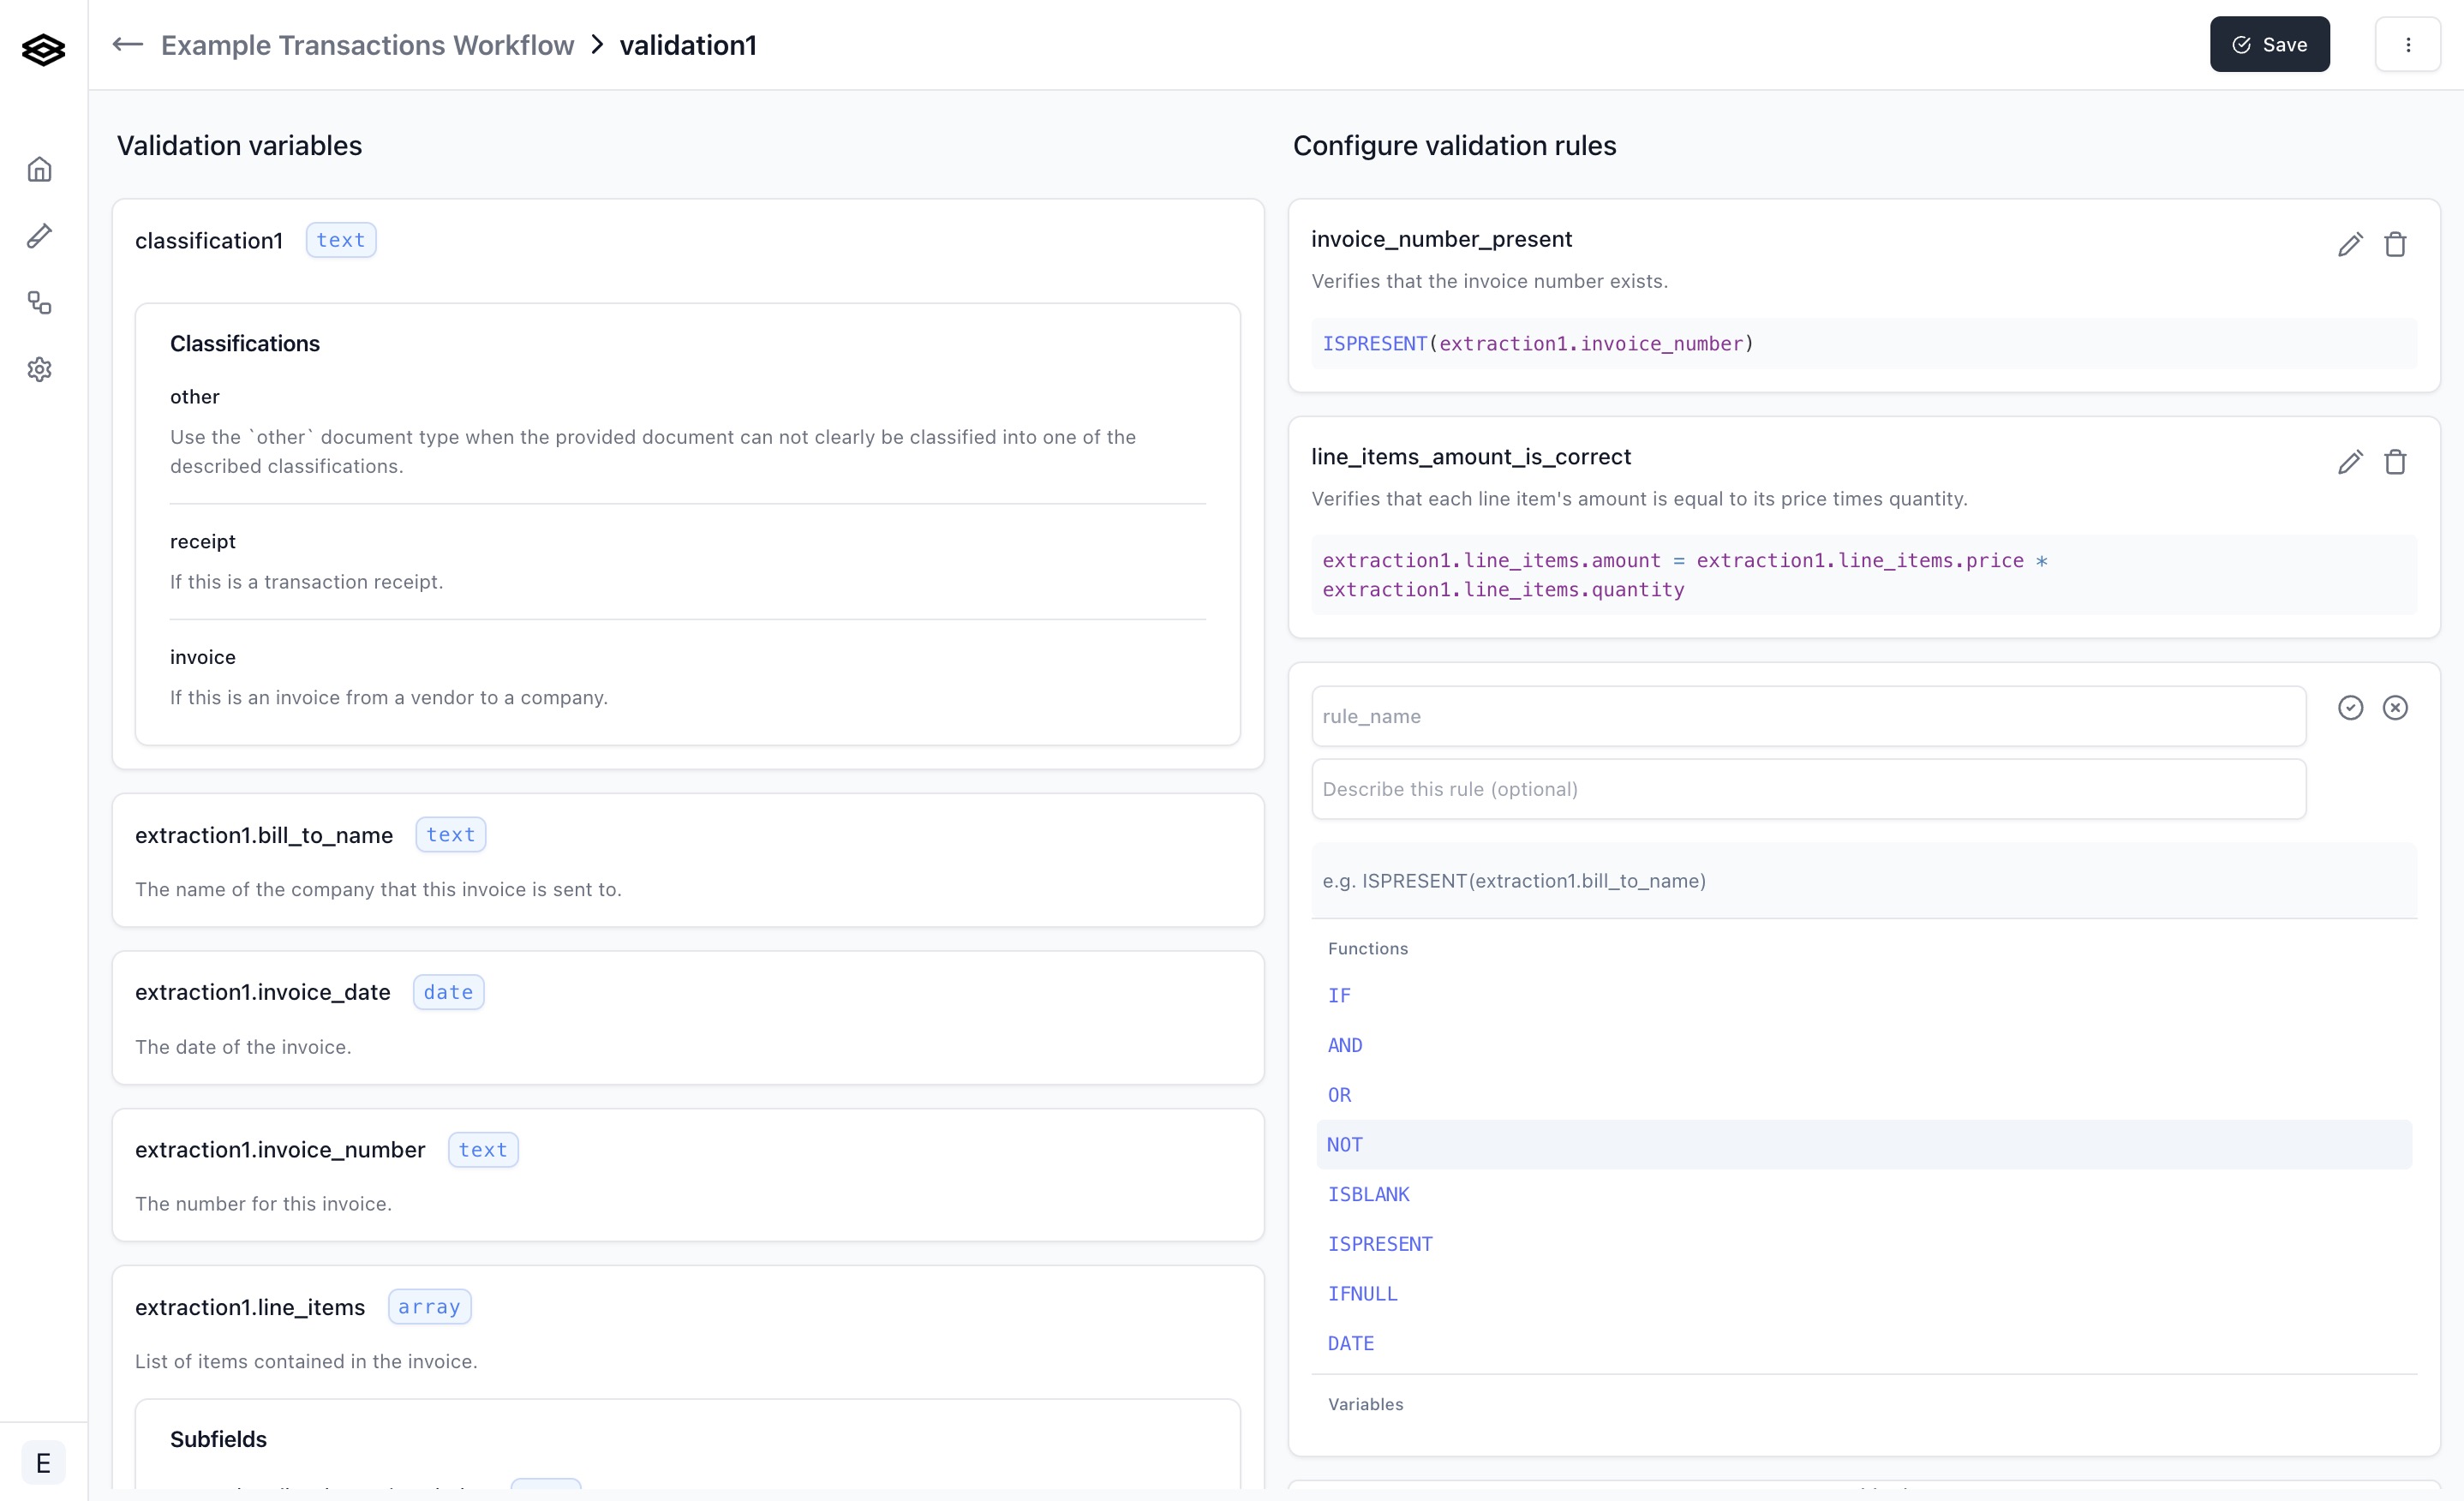
The configuration page shows the variables that can be referenced in formulas on the left side and the defined validation rules on the right side.
 To add a new rule, click the
 Add rule button on the bottom of the right side of the page.
To edit an existing rule instead, click the edit icon (pencil symbol) in the top right corner of the rule.
A rule has the following fields:
Name of the rule. This name will be used as a reference when viewing the
results in the Dashboard or in the webhook response.
Optional description of the rule.
Formula expression that must evaluate to a
boolean value. See
Formulas for details about formula
syntax and functions.Save button on the top right corner of the page.
Important: Do not forget to save your changes! An edited, but unsaved rule
will have no effect on your workflow.
Viewing results
Dashboard
Validation results can be viewed in the Dashboard once a workflow run is complete or is awaiting human review, along with other step results.Webhook
Validation results are included in webhook requests’WorkflowRun object under the stepRuns field.
See the validation result schema here.
